Planting In Containers
The easiest way to start a classroom garden is to use small planter containers to create traditional, soil-based growing environments. If you choose this route, keep in mind you do not have to use the standard wooden planter boxes! Traditional planters can get pricey, so thinking outside the box can not only be a creative and fun experience for students, it's also a great way to cut down on costs. Things like egg cartons, two litre pop bottles and old coffee tins all work great as growing containers.
Allow students to choose their own planter containers, but bring
in a few extras just in case. Give students examples of the types
of containers that will work for their planters, and encourage them
to not only be creative in their choices, but to make them their
own. Draw funny faces on them! Give them names! Everything goes,
and the more that students feel connected to their plants, the more
committed they will become to seeing their plants through to
maturation.
GUIDELINES FOR CHOOSING PLANTER CONTAINERS:
- They need to be sturdy enough to hold moisture (and dirt) over the course of at least a few months.
- They need to have some sort of stable base (or have something that can hold them in place).
- You'll want to make sure that the containers you use match the soil requirements of the plants, fruits or vegetables you've planted in them. See here for the recommended soil depths for a few common plants and vegetables.
Beyond that, there are no rules so get creative!
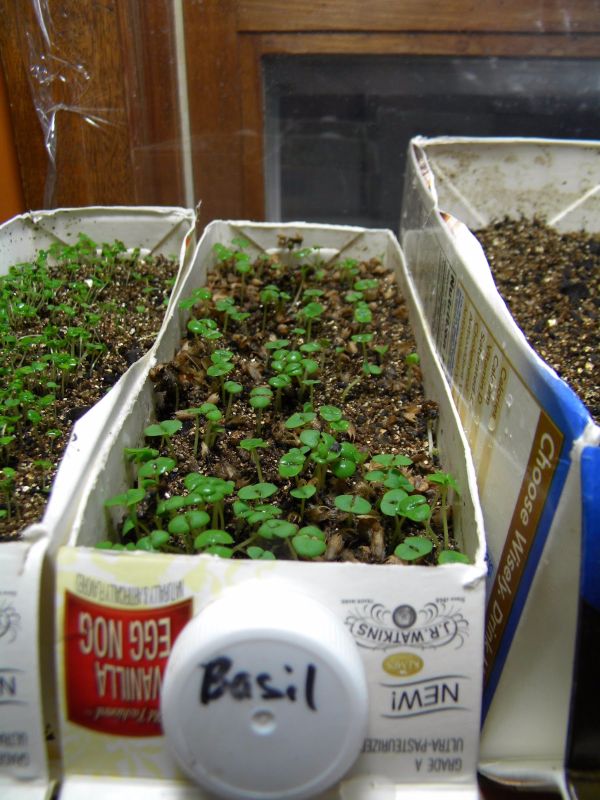
Milk cartons work just fine as classroom planters
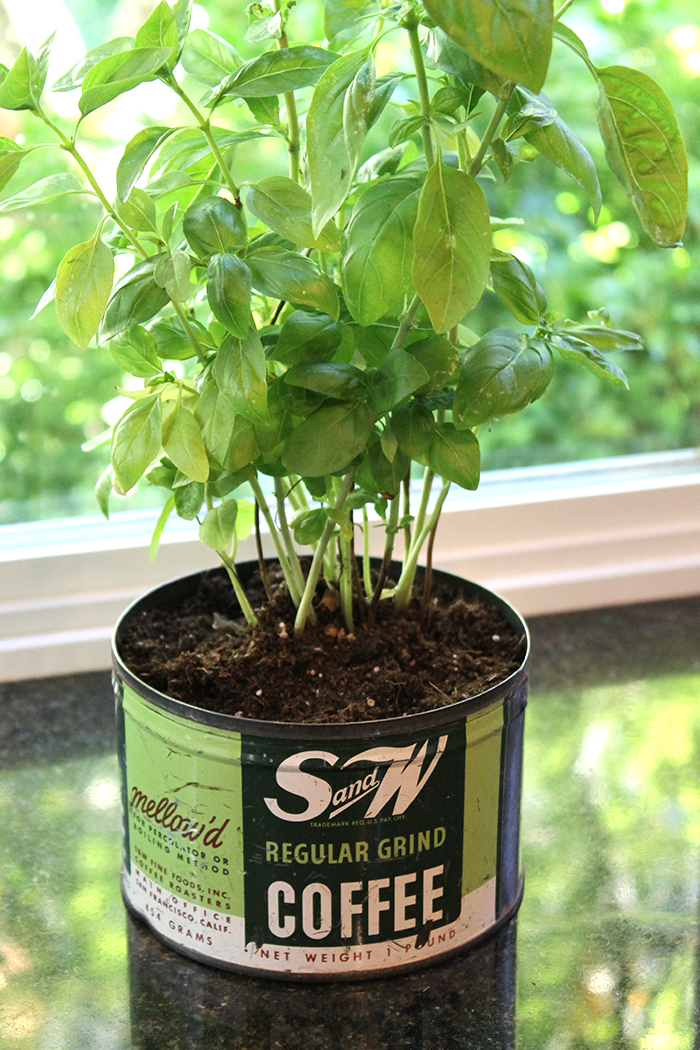
As do recycled coffee cans!
If you're looking for larger containers, but don't want to go the traditional wooden planter box route, consider using recycled items like old bathtubs or sinks--or use one of Stephen's favourites: toilets! Ask parents, colleagues, friends for anything they're looking to recycle or get rid of. Have students decorate their containers to personalize them and bring the garden to life.
Once you've chosen the types of containers you're going to use for your garden, as well as the types of plants you want to grow, the next step is going to be to set up your growing environment.
First thing you'll have to consider is whether the plants you've selected match the size of container you're using.
Here's a table of some common vegetables and the soil they require
| Soil Depth | Vegetable Types |
| 4-5 Inches | Chives, Lettuces, Radishes, Leafy greens, Basil,
Coriander |
| 6-7 Inches | Garlic, Kohlrabi, Onions, Peas, Mint, Thyme |
| 8-9 Inches | Carrots, chard, Cucumber, Eggplant, Fennel, Leeks, Peppers, Spinach, Parsley, Rosemary |
| 10-12 Inches | Beets, Broccoli, Okra, Potatoes, Sweet Corne, Summer Squash, Dill, Lemon Grass |
Here's how to
set up the growing environment if you're using small size
containers (Coffee cans, for example):
- Wash out and clean your container. If you're planting ornamental plants, clean containers using a solution of one part household bleach, nine parts water. If you're going to be planting vegetables, make a white vinegar solution that's 1:1 water to vinegar. Allow containers to air dry.
- Punch holes in the sides of the container, toward the bottom, with a nail or screw. Make at least four 1/4-inch holes for good drainage.
- Now, fill your container with your growing medium. Combine one part compost and 2 parts sand and peat moss. You can also add a small amount of fertilizer into the soil mix before planting, making sure to follow label directions. (Stephen recommends the Scott's line of fertilizers, but feel free to use any type of organic fertilizer).
- Plant your seeds, following the directions on seed packets.
- Place the containers where they will get as much light as possible. For vegetables, you might want to also supply supplemental lighting with cool white fluorescent bulbs. If you're growing flowers indoors, use full-spectrum fluorescent bulbs.
- Apply an organic fertilizer to container plants weekly. Follow label directions based on the type of plants you're growing. (Miracle makes a great organic fertilizer that you can find at any Home Depot or other hardware store, but you any organic fertilizer will work).
- Water the containers when top 1/2 inch of the soil feels dry to the touch. Add water slowly until about 10 percent of it seeps from the drainage holes. Use a pan to catch water from the drain holes and discard excess water. Do not leave the coffee can sitting in the pan of water.
If you've decided to
use bigger planter boxes, you'll follow essentially the same
process as above, just on a larger scale.
This is a list of helpful tips and things you'll want to be mindful of when planting in bigger planter boxes:
- You can be equally as creative when choosing larger planting containers. Some of Stephen's favourites include old toilets!
- You'll need to be conscious of what plants you plant together in each planter box, as it's likely you'll have multiple types of vegetables/flowers/fruits sharing one box. When combining several different types of plants in one planter box, it's best to match plants that have a similar need for water and fertilizer. For example, rosemary, which likes hot and relatively dry conditions, would not be a good match with water-hungry cucumbers.
- As a general rule, you don't want to grow vegetables from the same plant family in the same planter, because they'll compete with each for the same nutrients and deplete your growing environment of nutrients quickly.
- To maximize space, you might want to combine a trailing plant with an upright plant.
Check out the GBM Guide to
Urban Gardens for more detailed instructions on how to build
and grow using larger containers.